Showing posts with label diy. Show all posts

Saturday, 3 January 2015

SEWING FOR TWO


Sometimes I manage to surprise even myself with the amount of things I am able to get done at the same time. Or, in some (most) cases; the amount of things I manage to do when postponing something else that I actually should be doing.

So because organising my paperwork for my bookkeeper brings out the creative need in me instead, I sew a slipover for Dag -
A slipover pretty much the only thing I can come up with to sew him "just like that" as he is not a little girl I can sew dresses for  -he could have worn those kind of mini muumu-style baby/toddler dresses when he was smaller if I'd made him but I think he's beginning to be to old for such. So slipovers it shall be!

I made this for winter out of a warm stretchy soft fabric. Might try to give a pair of (simple) pants for him a go too!


As I was on it I also sew myself a skirt! I always had this cute-and-stupid idea of making matching mom-girl dresses if I had a girl but I can do it like this instead!


It is something of a 1/4-circle skirt -normally I always measure and do the circle-skirt maths, but because I was kind of in a hurry (=wanted to wear it straight away) and since the fabric is very stretchy and easy, I just measured it on me from one corner; how much I needed to get it to cover my behind. Then I sat down and cut the quarter of a circle straight on the fabric. I sew it together in the back and added a two small darts in the front and two in the back for a slimmer fit, and then attached a thick waistband afterwards.


I also added suspenders.


The suspenders can be attached or removed with small hooks for variation.


And now we are adorably silly and matching!

The fabric is from Eurokangas and my knit top is from KingLouie, shoes Frollein von Sofa. I've worn them all Christmas whenever we went somewhere.

Tuesday, 23 December 2014

MAKING OLD SHOES SHINE: THE SPARKLY VERSION


Suitably for DIY-season of the year (yes,  Christmas time) I was asked to collaborate with Yahoo! and get acquainted with and inspired by their Yahoo!DIY digital magazine - and then come up with my very own little do-it-yourself.*

Yahoo!DIY has a fresh and easy-to-navigate-trough layout, and is now full of eye candy along with lots of tips and tricks to DIY during the Holidays; gift and wrapping ideas, recipes, different decorations and more. I came across a post that mentioned both bling and glitter in the headline (on how to add a little extra glitter here and there without any mess) and as you know, bling and glitter has -apart from checks- been a theme here lately, so that was my thing! And I intended to add a LOT of glitter.

Some time ago I made 
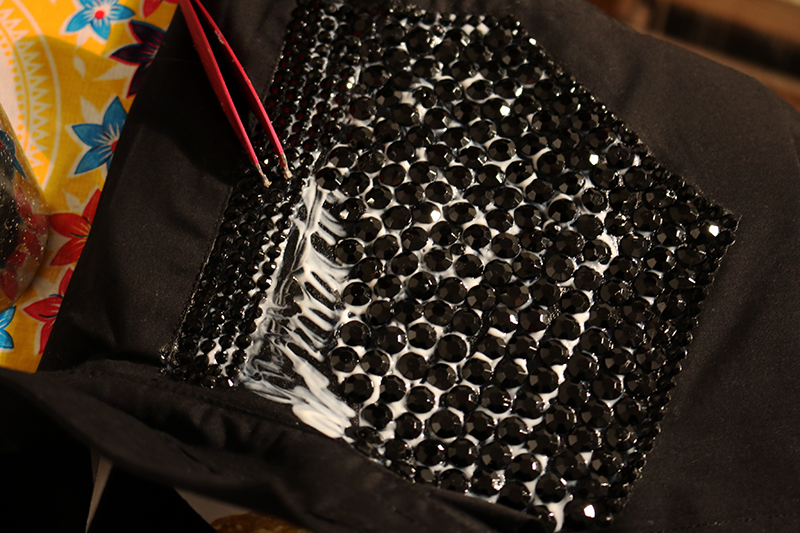
an old pair of shoes fancier by adding rhinestones to them, and last week I pimped up a plain shirt by embellishing it -now it was time to spice up another pair of shoes: to glitter them up!

Glitter is something that growns on you. There was a point in life that if asked, I would have said that there can be such a thing as too much glitter. But nowadays, and especially at this time of year, I would say No, there simply can not be any such thing as too much glitter or bling. This often from a burlesque point of view, which is slightly ironic and full of the love of all things camp and kitsch. (And if you haven't noticed, Christmas is a very kitschy holiday.) But glitter, even when there is a lot of it, can still be stylish and classy too. And depending on how you choose to style a pair of glitter shoes, the result can be either wonderfully over-the-top or then very elegant. Or maybe even both.

Some of you may recall that crafting and I are not total bff’s, but that is only goes for certain areas of crafting. As I have accepted a lot more glitter in everyday life, I have also come to enjoy the bling up’s a lot more, to the extent that I sometimes start new projects and choose items to bling up without having an actual reason for it. But in this case there is very much reason - to give old shoes a new life. I have glittered up several pairs before and am often asked about how they've done.
So, here’s how I do it:

First take note that this will require a day or two - the steps are rather quick to do but the waiting in between takes time. So if you want to wear your blingy shoes for  Christmas you might be in a bit of a hurry, unless you start in 1-2-3-NOW! and yo might be able to wear then for Christmas day (which is, as I remember from the days when I was young and out and about all the time, the day to part-ey out on town.) But, even better, and as you perhaps might have a few other things on your hands righ tnow, make them in time for New year’s eve to definitely out-sparkle all other shoes in the room!

So - take out an old pair of shoes -or new ones if you so please, but wear them in first - and clean them up if needed. I find this works best on satin (or canvas) shoes, but basically you can do the same on any kind of material - this is also how I made the glitter surface for the (plastic) soles on my red heels that I embellished some time ago.

The pair I’m working on are a pair of by now rather sad looking dancing shoes I use on stage, but as I’ve said before; dance shoes are the most comfortable of heels as they are soft tand flex. In other words, perfect for parties as well!

You will need fabric embellishment glue, one that dries see trough and elastic. I go for my old pal Jewel-It. Then you'll need a brush to paint it on.

And, glitter. Heaps of glitter.

But don’t be chocked by the size here! For someone that pours glitter on herself and throws it in the air for a living, this is standard size and I go trough several of these a year.

A smaller size (that some perhaps may still refer to as a big jar of glitter? Hard to say when you have caught what we call glitter-herpes) will do fine, because in the end you will not need that much to cover your shoes, although the process requires quite a bit. You can smarten things up, and in the same time get by with less of a mess if you grab a few papers along for your working surface and an extra jar for the glitter.

First, fill your shoes with newspaper (or a few rolled nylon socks) in order to keep their shape and to not get messy on the inside. Start by covering one side of the shoe with glue; paint on a rather thin layer (it will sink in fast). Apply a second layer after a about ten minutes. Try to paint the glue on as even as possible - don’t make the layer too thick as the glitter will not attach evenly then, but make it thick enough still not to be soaked in straight away. It should leave a visible surface. (If you are working on another kind of material that won’t soak up the glue one layer is enough).

Fold a paper in half and open it up so that you have a little crease in the middle. Place the shoe on the paper and pour glitter on it. And I mean pour! Pour glitter on it like there is no tomorrow! Make it pile up! Glitter it like it’s 1999!

The shoe will look a bit over glittery and fuzzy, but it will not remain that way. Wait for some ten minutes again, and carefully lift the shoe and let the excess glitter fall off on your paper. Tap the heel and the toe a few times on the paper to get all the extras off.

To re-use your sparkle, fold the paper in half and pour the glitter back in your jar.

Leave the shoe lying on the side to dry while you start with your other shoe.

You can do the other side after an hour or two, depending on how well the first side has dried. Let that side dry too and then glue and pour gitter on the back of the shoes, leave them standing to dry. The glitter surface may look a bit uneven and weird, but fear not, this is only the first round.

You can speed up the drying process by gently blowing the shoes with a hair dryer. And I really want to stress it when I say ‘gently’ -keep the hairdryer on a good distance and on low effect; too hard a blow can make an uneven result as the glue-glitter mass can move. Also, do this away from your crafting table, unless you want to cover your whole house in glitter (which, depending on a lot of things, may not necessarily be a bad idea. But it’s not what were after here).

Your shoes are ready for the next coating after a few hours, or the next day. Paint on a new layer of glue, thick enough to cover all the glitter. It may seem like you are ruining the fine sparkle, but don’t worry, they will improve! Pour on glitter en masse again, wait a while, tap it off and let dry. Repeat on the other side and in the back. Let dry properly.

Two layers will most like be enough, or then go for a third, your choice.
You can choose to finish your project here and strut along in super glittery shoes already. Give them a light fix with hairspray or fixative (for coal crayons) before you head out.


I like it with a little less crisp and more smooth finish, that also makes them last longer, so I paint on one last layer of glue, thick enough to cover all the glitter, on. Once again you might get sceptic and think that you’ll ruin them, but don’t worry, as the glue dries the shoes will sparkle like whoa! again!

Like this!
Now dance the night away in shoes that would make Dorothy and her ruby slippers  jealous.

Some small extra tips and trix:
- you can mix two shades of glitter for more ‘depth’ to your sparkle, like a more yellow and a more brownish gold for exampe. Or red and fuchsia. Mix them in the jar you work with before pouring on.

-Bling your heels to the max by adding a few chrystals or rhinestones on top afterwards., for example in the front on a pair of sandals.

-Glitter just a section of you shoe,  the back and heel for example. Make sure to draw an exakt line with the brush when you put the glue on for a neat and pretty result, or then place place a trim /ribbon or a row of rhinestones on the edge to cover it.

For more crafts inspired from the magazine search for, or for sharing your own creations inspired by the posts use #yahooDIY

*) to be clear, this post has been sponsored by Yahoo! and I give my sincerest thanks for sponsoring me in the making of my glittered shoes. While this was a sponsored opportunity from Yahoo!, the idea of the post, it’s content and opinions expressed here are, of course, my own.


Sunday, 21 December 2014

LAST MINUTE CHRISTMAS GIFTS


Don't get frightened by the headline there - last minute is still far away. According to some at least.

After being rather late when it comes to Christmas myself (in my book at least), this weekend I've made lots of preparations,  glittered things up here and there, prepared food and gifts, bought flowers (I always by a bunch of flowers whenever the season changes) and all that. I love giving presents and prefer never to give anything that is not of any use (unless it is really really funny or really really kitsch). But there are always those who it can be hard to find nice gifts for. Apart from giving away a dinner, tickets to see a play or movie, a day together like going bowing or so or a gift card, here are a few tips and tricks for nice gifts when you are in a hurry or don't know what to give:

Anything in a jar. You may recall that I love jars. And most people have a need for them anyway. Putting something rather mundane nicely wrapped in a mason jar makes it more of a gift, even though it's a pair of classic wool socks. But you can of course stuff your jars with lots of goodies like...

...homemade gingerbread.  Or sweets - home made candy or raw candy. Or go for store bought if you are not the baking type. Or mix!


Or store bought goodies. Mix healthy and less healthy. Or salty and sweet!

Or, give away a recipe to make. Cookies for example, where the receiver ads just the fat (and eggs, if needed). Remember to add the how-to (and ingredient list) along with the gift. (Recipes with candy or dried fruit in it looks nice when jarred up. )

Fill a bowl - new, flea market find, your choice - with fresh fruit and some extra tinsel to go along.
deliver as it is or wrapped in cellophane. Or, wrap it in -

...a tote bag deluxe (with clean seams on the inside). Mke on out of nice fabric to use as wrapping and fill it with just anything, like tea or coffee. Or chocolate. You can seldom go wrong with chocolate. In my humble opinion at lest. Or sew a kitchen towel (as simple as it gets) and do the same.

Or, place those wool socks or movie theatre tickets in a nice box that can be used for storage afterwards. Two-in-one!

Or then - give a book! Because you know, books are great.

Thursday, 18 December 2014

JOHNNY CASH MEETS LIBERACE, OR, THE BLING-UP OF A SHIRT


This season- a part from checks- it's all about blinging up old items over here. (Or, if you so will, plain new ones). No such thing as too much sparkle during the festive holidays!

Some weeks ago it was about putting some extra bling on a pair of heels, this time we'll spice up a shirt.

This shirt was originally made for a thing on stage, but since those moments would be very few and short in nature, I made it with the intention of being able to use it myself afterwards.

So you will need a shirt - I used a mens' slim fit shirt as I wanted it to be long - rhinestones of your choice, appliqué glue, some supporting fabric to iron underneath and a brush to apply the first layer of glue. Or, needle and thread if you come across those rhinestones that can be sewn on. (And if you're patient enough to do so). I used acrylic stones, they are lighter in weight; this shirt will need a lot of them. Your shirt will take 24 to 48 hours to make depending on weather you add your bling to just the front or also the back; the glue needs to dry properly before wearing.

First, cut the supporting fabric in the shape of the area you want to embellish (use a piece of  paper to get the shape right by trying it out on your shirt first and then transferring it to the support fabric), or a bit larger than that, and iron it in place. This shirt had double fabric at the back yoke so it did not require extra support.

Then, working first on one side, put glue on the area to be embellished. As you can see I placed a magazine under the area I am working on so the glue won't go trough to the opposite side.

I sparkled my shirt up in a western fashion but any pattern will look good; lines or dots or, yes,  lines forming...checks. Then you might want to draw them out first so they end up even and don't look like something your kid made you for father's /mother's day and that you were forced to wear. (Because, that's how it would end up for me at least.) I drew along the edge of the support fabric, which I had cut into exactly the shape of the area I wanted embellished.

I use Jewel-it glue for almost anything of this kind, it dries slowly to be fully transparent and elastic and the items can be washed.  So use that or any similar. But it will leave ugly stains if you drop it where it's not supposed to be, so be careful. The glue is best spread out with a brush - rinse the brush and put it in warm water immediately afterwards if you ever want to use it again (like, for the other side after a while).

Let the glue sink in for about ten minutes and then apply some more to the section you will start with.
I apply my stones with a pair of tweezers. Carefully lift the shirt a little bit every now and then so it does not stick to the surface underneath. Then on to the other side!

Let the shirt dry for an hour or two laying down until the glue is no longer white and then hang it to dry over night before wearing - or before doing the back (after which you of course will have to let it dry over night again).

The front of the shirt and the back the day(s) after. I did not put embellishment all the way over the shoulders because the shirt would then have turned very hard and bulky when worn.

I used 700 of the bigger sized stones (200 on each side in the front, 300 in the back, bought them at 2,50€/100pcs bag) and some 400 of the smaller ones (about ten euros). Whatever you chose to make, remember you will most likely need more pieces than you'd think of at first (unless this is everyday business for you), that goes for all embellishments.


And here's me wearing my western Cash goes Liberace-shirt!


This time with a pair of velvet capri leggings and red details, the next time perhaps with a pencil skirt.

Wednesday, 26 November 2014

MAKING OLD SHOES SHINE : THE BLINGY VERSION


It's the official party season. (Which for me is more of a work season; no time for parties.) All display windows ad billboards fill up with black and gold and red and glittery sparkly things for the season. Well, it's Christmas all year round in many ways for me (not just the lights here and there) as the amount of sparkly stuff  I nowadays have to drape myself in is, well, a lot. For all the obvious reasons.

I was blinging up an old pair of shoes for a show, but, this is of course something you can do without having to strut with them on stage in. You may remember my tip from some years back about attaching jewellery to a pair of heels? Another quick and easy way to bling a pair of shoes up is to use some rhinestones and glue and TA-DA, instant party shoes!

I normally use a fabric glue that is still elastic when it hardens but as the shoes I decided to pimp up are made of (faux) patent leather I used hot glue and pre-glued rhinestones instead. Because theses are for a themed act I put the bling on to resemble daisies. (I also made a glitter surface on the sole but we'll get back to that in another post.)


Be sure to clean the shoes before you start. The smaller rhinestones were pre-glued and came in lines (from Tiger)  which made this an easy task. Otherwise I use a chrystal pen or a pair of tweezers to grab and place the pieces.  Remember to be quick if you work with hot glue as it dries instantly - for bigger stones it's easy but for smaller ones that you might want to add in a formation (a line like here) I'd suggest another kind of glue that takes a little longer to dry. Haberdashery stores also sell rhinestones on a string, which would work nicely for this - the price per meter is high but you will not need so much for a pair of heels so it's doable.


And then it's just on with the heels and off to shine and sparkle!
(and yes I know, my working space is a mess as I, in my usual manner, am working on too many things at once...)

Wednesday, 10 September 2014

SMALL RED ADDITIONS


Dag's room. The one we've been working on only for about 14 months or so. And with working I mean not setting my foot in there apart from hanging up curtains there once in March, doing some occasional messy sewing and storing all my show-suitcases in. So he's still sleeping in our bedroom and playing all over the living room. In fact the whole flat has looked like shit not been too nice looking the last year. I'm too busy with everything and all the free time we spend at the farm. But as autumn always is my kind of new year I have actually done something about it; I've been organising my paper work and such to get it out of that room end elsewhere and started moving some of Dags things into the old study! Step by step, toddler steps.


We got him some basic wood furniture from ikea and pimped them up with some red. I still had some red spray paint left from when painting the heels on my boots red last winter, and coated the legs on the stool (that will work as a night stand) and the knobs on the chest with it. Quick and very painless!


The cat lamp has also finally found a real home. (And soon someone will even live in there!)


Thursday, 10 April 2014

2x REVAMPED


You  may remember the long pinafore skirt I have? A friend of mine got the same one but felt it did not fit her so she passed it along to me -ssometimes it's good with doubles of certain pieces of easy, everyday clothing. As the material on the skirt got rather floppy after the first wash already I thought I might as well turn the other one into a shorter skirt that'd go well with boots now in spring (and for autumn).

Snip snap with the scissors and a few rounds with the sewing machine and there it was!
And  I - of course -  made a pair of pockets for the skirt out of the cut-off hem.
If you cut a hem shorter (or the sleeves of an item)  it's smart to use the left overs for something to go along with the updated piece, especially if the fabric is patterned. If not pockets then you can make a hair band or scarf out of it.

The blouse is the basic top I revamped by sewing a lace appliqué on.

Dag chose the bangles for me and came and put them on.


Tuesday, 11 March 2014

THE RED BOOTS THAT ARE EVEN MORE RED NOW


You may recall me mentioning red suede lace up boots on several occasions trough the years? The kind of shoes I liked the idea of but didn't necessarily want to own, as I didn't really wear boots for many years. But due to practical reasons and shorter hems of mine I've been digging out my old boots from their hideabouts during the year and some time ago decided was it was time to start the search for the red ones, if such were available. Well of course, the internet delivered after some time and now I can tick that off my list!

But, the heels on the boots were beige and for me heels in a different color than the shoe only works in certain cases, and this was not one of those cases. So I did not really come around wearing the shoes -the whole point was that they had to be red all over.  The next step was then to try and paint them! I once coloured a pair or rubber heels (and soles) with a random textile paint I had at home and it stayed on super well for years so I was rather positive about perhaps getting something to stay on these too, although this was riskier as the heels are plastic which is not the same since it won't absorb the paint. Heels take a lot of hits and most likely any added color might rub off easily.  But worth a try still -

Went over to the hardware store and decided on red spray paint (and a brown-red primer), hoping the difference in shades would not turn too bad.

Put some masking tape to cover the actual shoe and gave the heels a couple of round with primer and then paint. I filled in uncoloured areas close to the seam with a red marker  - I coloured a pair of satin dance shoes like that once, with a marker, and it turned out super - but thats for another post.


And it did not turn out that bad! Well, quite good actually. After a few days in action the color is still on, so so far so good...


Thursday, 6 February 2014

PIMP MY JACKET


 I fixed up an old winter jacket of mine!

Or, old and old, it has indeed been waiting in my closet for quite some years, but I never really properly used it . It's is plain black duffel I got on sale with the intention to fix up with a faux fur trim as I couldn't find such a jacket anywhere at the time. I also got it a little too big in order to fit an extra lining; it was when we had a second very cold winter and I wanted it to be super warm. Well, I did do all of that, but I can tell you that extra fleece lining of mine didn't turn out that well as I in my usual matter just cut a little like this and that trying my luck... the arms got all twisted and weird. And getting the big shawl-like collar I wanted to stay in place around the original collar was harder than I thought. So I used it perhaps once or twice and then hid it out of sight and out of mind trying not to think of all the work and money my little idea had cost me.

The next winter all stores were of course full of jackets with furry collars and cuffs.

But, I decided to fix it up now instead of it collecting dust in the closet!  With a thinner, easier fabric instead than the thick fluffy fur I used the last time. And in leopard, which is better anyway. Aaand forget about any extra lingins, jeez, I have big knits to do the trick. (And I think the super-cold is over for this winter now -fingers crossed).

Adding cuffs to clothing is pretty easy. Just measure the sleeve hole and add a cm or two for the seam. I want a lot of warming soft cuff on the inside of my sleeve too, so I make it rather long and then fold it over the sleeve. I fold it twice, so that it is double in the front. I sew the cuff in place by hand.

The collar is a little trickier, but this time around I made it smaller than I had tried on the first round, and did it with a little more preparations. I traced the original collar and then sew my pieces together to fit like a pocket or bag around it. I sew it in place with tiny stitches by hand.


Done!

The material was a bout ten euros and it took me an hour or so to get the work done. So it sort of feels like I got a new winter jacket almost for free, as I can pretend that 2010-thing never happened.